Friday, September 24, 2010

Phriday Phun

GET ME TO THE CHURCH ON TIME!


Here's my photo story for Phun Phriday.  My son and his bride (last year's marriage), wanted to do something fun and edgy after the 'official' wedding photos.  We went out to the great Salt Lake and just had fun.....that is, until we were attacked!  (More on that in the next post).  Anyway, hope these photos put a smile on your face to start the weekend!

Wednesday, September 22, 2010

Tech Talk Tuesday

Photography - Reality, Artistic Creativity AND/OR a Combination of Both 

So, as photographers are we artists, story tellers, historians, journalists, painters, snap shooters, etc. etc.???  The answer is YES!  We can be whatever our personal style and interests dictate.  This post will show you my style of blending photography, story telling and creativity:


Battery Mendell
This facility was build in 1905 to keep enemy warships from entering the San Francisco Bay Harbor.  At the time it was armed with the biggest guns in America, 12 inch cannons.  They could be hidden, then rise up for a surprise attack. 

This day was dark, except the sky which was white with fog.  Here is one of many SOOTC shots I took at various exposures.  We walked around and up the stairs and saw where the cannons were positioned.  The bars on the windows of the jail area, the heavy metal doors with rivets, the graffiti, the stark concrete and remains of peeled paint all gave a very eerie and menacing feeling to me.  The textures and details on the walls were amazing.  I'm always looking for new textures to use as overlays on photos, so I took several photos just of textures.

As is often the case, when I looked at my photos on the computer, I didn't get my camera to record what I saw, and just as important to me, I couldn't capture the mood and feel of the scene.  Yes, the above image is dark and gloomy as was the case, but still uninspiring to me.  Here's what I did:


This is one of the texture shots I took.  First I changed it to B&W and increased the contrast a bit.  Then I added it as a layer to the above original photo, altered the opacity, and masked/erase parts on the building where I didn't want it.  To me, so much white sky was boring, so I wanted to mimic the textures of the building. Then I used Topaz Adjust (a Photoshop plugin) to accentuate the contrast and clarity.  Basically I moved the sliders until I was happy with the result.

Final Image

The gritty, grainy, rough textures, the stark coldness of the concrete, the menacing thought of enemies attacking our shores, and a prison to stop them.  This photo more clearly tells me this story when compared to the original photo.  

WHAT DO YOU THINK ?  IS THIS ART OR IS THIS PHOTOGRAPHY????? 

Sunday, September 19, 2010

Oakland Temple

Just Before Sunset
If anyone does not know why photographers call sunset the 'golden hour', this photo should explain.  The temple looks beautiful bathed in this warm light.  And, believe it or not, I did nothing to the color of the sky.  (But I do notice that when I downsized to post, it created a subtle 'blotchy' look.)

At Twilight
This is a multiple exposure image, (HDR).  By underexposing and overexposing several shots and combining them, you can create an image with a greater range from light to dark than with a single exposure.  HDR works best when you have a scene with extreme lights and darks, such as this one where there is a brightly lit building, and deep shadows in the shrubbery.  Although I could see these shades with my eye, my camera couldn't. 
On this shot, I did not change the colors, but I did make an adjustment in camera.  I did a 'Tech Talk Tuesday' on this quite a while ago and it works whether you are doing portraits or landscapes outside and are shooting at twilight.  Simply change your white balance to the 'florescent' preset (on a Canon it shows a picture of a rectangle light.)  This will make a pale blue/gray sky pop with color, and in this shot, it also made the dull gray foreground water turn dark blue.  Very dramatic.
To answer some questions, this is one of over 130 temples around the world owned by the Church of Jesus Christ of Latter Day Saints, (Mormons).  While we were visiting, we learned that many brides of all religions come here to have wedding photos taken in these lovely gardens.  At one time the church decided to turn off the lights at night to conserve energy and were approached by city officials saying they would help pay to keep them on.  Evidently the lights are so bright on the hill that the temple acts as a beacon and landmark for ships and planes.

Sunday, a Time to Worship

Oakland LDS Temple

While in the bay area for my son and daughter-in-law's wedding open house, we spent a couple days seeing the sights.  This beautiful temple sits on a hill and overlooks San Francisco.  Check back later tonight and I'll post my favorite night shots.  It is spectacular with night lights.  Oh, and have a wonderful day of worship and rest!

Friday, September 17, 2010

Phriday Phun

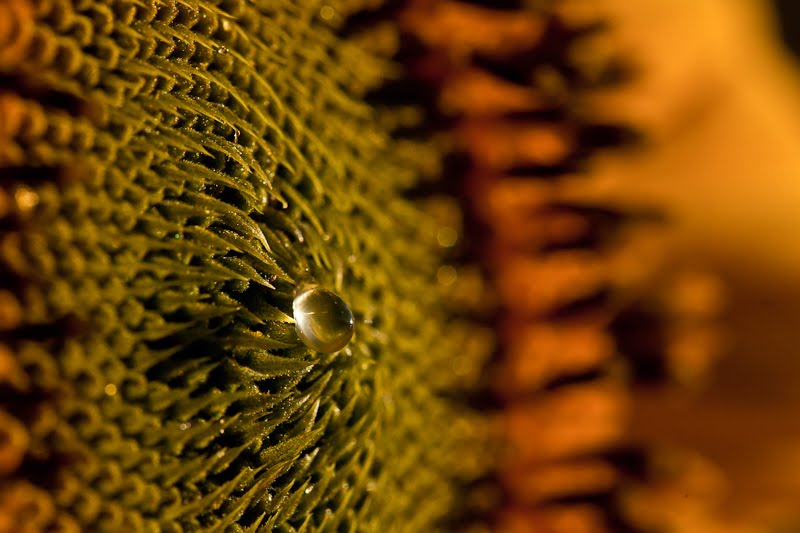
Phun With Sunflowers
First Light

Busy Bee

A Single Dew Drop

We're finally home and it was good to take a stroll in my garden this morning.  Our corn is done, we have a ton of ripe tomatoes and the sunflowers are in full bloom. 

Friday, September 10, 2010

Phriday Phun

What Every Modern Homemaker Dreamed of Owning!

 Doesn't it make you wonder what future generations will think about our 'antiquated' technology???
(We've gone to San Francisco to attend an open house for Tyler & Emily's wedding, and to celebrate our anniversary.  Be back in a week.) 

Wednesday, September 8, 2010

Tuesday, September 7, 2010

Tech Talk Tuesday

Discussion on Previous Post and the Comments
On the last post I presented the technical challenges I had to overcome to create a photo that realistically represented what I saw.  I wanted the foreground and the background and the moon to be in focus.  I wanted to show some of the detail I saw in the landscape.  I wanted to show how beautiful and bright and clear the moon was as well.  I started with a wide angle lens and was able to get the best focus on all elements, but it made the moon look really tiny.  A telephoto did the best job with the moon and that's the main subject, so I started at 1/8 sec., f/22 with a focal length of 200mm and focused on the moon.  Then I distanced myself far enough away so I was able to get the jet ski and mountains in one shot, and focused a third of the way into the scene (hyperfocal distance), and took some more shots.   Then I took more shots, varying the exposure, because I knew that the camera could never record the bright moon and the dark landscape.  I had some shots where the landscape was almost black in order to maintain detail in the moon, and other shots where I got detail in the landscape, but the moon was totally blown out.  And yes, as you've probably guessed, I used Photoshop with layers and masks to combine various parts of different exposures to come close to what I actually saw.   I like this image at a glance, but in reality it is not a really great shot technically.   I forgot to up my ISO and all the images are at 400.  There is a lot of noise and other strange aberrations, especially noticeable in the sky.  (Scott, the white balance was the same on all the shots and I did not alter it during editing.  Ginny, if you find the center of the sky, then look down about 1/4 to 1/2 inch you'll see what really looks like a dust spot.  It is blurred and barely visible, but that's the bat.  He shows up much clearer on the full resolution version.)      


Monday, September 6, 2010

Moon Over Lake Powell

Riding In the Moonlight

The big, full moon made for lovely nights, but it was so bright we didn't see the usual star show.  Beautiful moon, romantic evening rides....perfect for the newlyweds that were with us.  We have this nice houseboat with beds, air conditioning, all the comforts of home, and the newlyweds decided to 'sleep' in a tent on the shore....away from the houseboat.  Go figure!

This image is how the scene looked to my eyes.  A telephoto lens would have kept moon the right size and with some detail, but the foreground was not in focus and the immediate foreground was not in the picture.  A wide angle lens puts everything in the picture and in focus but makes the moon appear smaller than how I  saw it.  Also, I could see a lot more detail and color in the low light night than my camera is capable of recording.  How would you solve these problems to have an accurate representation of what I actually saw???

Oh, I forgot to mention the bats???  They come out at night and eat the insects, which I'm sure is why we are never bothered with mosquitoes at Lake Powell.  Can you see the bat in this photo?


Saturday, September 4, 2010

Antelope Island

HE AIN'T HEAVY......
(the little dots are flies)

PHOTO SHOOTS OVER.... I'M OUTTA HERE!

I was about 15-20 feet away from these guys, shooting with a 70-200mm lens, and these shots are not cropped.  Lest you think I'm totally foolhardy, I was in my car, on a road, engine on, car in gear, foot hovering over the gas pedal, ready for a quick get-a-way.  I shot out of the window using the window edge as a tripod.  I was shooting in the mid day bright sun which produced flat, boring lighting and color so I post processed in sepia and popped the clarity in Lightroom.  (Antelope Island is in the Great Salt Lake, and close to Scott and Chad's neck of the woods.  I made the drive hoping to see a hot air balloon festival but  all I saw was one deflating balloon that said ReMax.  It would have been a wasted morning, except for a few photos of some of the bison that live on the island.)

Friday, September 3, 2010

Phriday Phun


OH, THIS LOOKS SOOO YUMMY!

IT IS YUMMY!

ARE YOU DROOLING YET?????


Tuesday, August 31, 2010

September Desktop Image


SUNFLOWER WITH FLARE

Here is my September desktop image for you to download, share and enjoy.  Just click HERE  then right click to set as your desktop image.   It should not be pixelated or blurry.  If you have problems, let me know and I'll help.

For those of you who might not know, at the beginning of each month, (with the exception of last month), I post an image sized to fit your monitor.  It is for your personal use, but feel free to share with friends.  Just don't use it for profit.  I thought I'd recap and list the monthly desktop images so far for 2010:


Tech Talk Tuesday Part 1

 Go WIDE for the WOW factor
If you've followed my blog for long, you know that I often talk about looking for ways to make my photographs stand out in one way or another from the average snapshot.  Sometimes it's the color, sometimes it's the composition, sometimes it's the angle, sometimes is fancy post editing.  All designed to make a photo interesting enough so the viewer sticks around to enjoy it longer.  (I know, I keep repeating myself!)  Another way to do this is to use your various lenses in unique or creative ways.  The photo in the last post, and this one were both taken with a 16-35 mm wide angle lens.   Wide angle lenses have great DOF (depth of field), so they are sharper from very close to the camera to infinity, and they take in more of the view than a normal lens.  They also make objects in the foreground larger, and those in the background appear farther away.  Some common uses for a wide angle lens are when you want to show a grand landscape vista, or maybe get all the people in a crowded room in the same shot, or my excuse to buy a wide angle lens, to take photos of the inside of houses (I'm a Realtor).  One technique I love, is creating the illusion that the object nearest the camera is much larger than it actually is which changes one's normal perspective and so makes for a unique look.  This automatically tells the viewer what the main subject of the photo is, while making everything behind the subject appear smaller and farther away,  creating a supporting backdrop.  These flowers were actually small, but they look unusually large and take center stage in this composition.  First I put my camera on aperture priority and choose the smallest aperture my camera and lens will allow, (large number such as f/22).  I chose a day with no wind and used a tripod.  My camera was probably only a few inches away from the foreground flower, but I focused on a flower about a third of the distance into the scene (hyperfocal distance).  This gave me the best chance of having everything in focus from flower closest to me, to the mountains in the background.  (Obviously, if I'd wanted the background to be out of focus I'd have used a large aperture.)  Hope this gives some of you another tool for your 'creative' photography tool box.       

Tech Talk Tuesday Part 2

How Big Should I Post My Photos on My Blog???

I've had several people ask me how I get my photos to post so big.  I'll tell you how in a minute, but first, some deep thoughts about photography, blogging, and combining the two.  (Don't worry, not too deep I hope!)  
The first question to ask yourself is,  "Why do I want to post big photos?"  No, actually the first question is, "Why do I post photos on my blog in the first place??"  Well, what is the purpose of your blog?  Here are some reasons to blog where photos may be included:

1.  Keep in touch with family and friends
2.  Keep an online journal of my daily life and that of my family
3.  Outlet for my creative writing
4.  Earn money blogging about a popular topic when I get enough followers
5.  Attract customers for my photography business
6.  Want to connect with others who share my passion for photography 

Of course there are many more reasons to blog, but of this short list, I suggest that for the first 4 reasons, small to medium photos will do just fine.  This is because the photos are just supporting the main reason for the blog, they are not playing the staring role.  In the last 2 reasons, photography IS the reason for the blog.
I did a quick check of all my favorite photo blogs I follow, and the majority post big, beautiful photos.  They say "HERE I AM" right at the get-go without any additional effort or clicks on my part.  Big photos say, "Photography is my passion, it's a BIG part of my life, and I want you to see what I see through my viewfinder."  It's kind of like the difference between watching a movie on a 16 inch TV compared to watching in the theater.  Big photos make a bigger impact and show off your talents as a photographer better. 
I also noted that most of my favorite photo bloggers only show one or two photos per post.  This gives me more time to study and appreciate the photographer's work.  When there are too many photos, I find myself quickly skimming through them without really seeing the photographer's vision.  This reminds me of a post awhile back on Scott Kelby's blog.  He was giving advice to professional portrait/wedding photographers who were trying to use their blogs and websites to attract business.  He said that one mistake so many make is they post way too many photos.  He said a photographer should only post a few of his very, very, very best images .  That way, potential customers will assume that all his images are amazing because all they see are amazing photos.   I believe he suggested having a fellow photographer pick out a few of the best images, because often we photographers have a hard time being objective about our own work.   On this blog, (which falls into the No. 6 reason mentioned above), I sometimes sneak in a series of family photos, but usually I try hard to be selective and think about what my viewers would really like, because I truly want you to enjoy and be inspired by what inspires me.  I am always so grateful to get comments and emails from people saying they enjoy my photography, but I often wonder if they'd be impressed with the thousands of images that don't make it to the blog!
O.K.  here's how I make my photos BIG:  First of all, I almost always shoot in RAW which gives me a huge file since my camera gives me 21 megapixels.  For each photo shoot I keep three files:  (1) the originals, (2) the edits which are the original size, (3) the edits resized for the WEB.  I use Photoshop and Lightroom which makes resizing really easy, but no matter what program you use, you have to be able to do this:  Size your photo to 900 pixels on the longest side, (and then whatever the number is on the short side to maintain the correct proportions), and then chose 72 dpi.  (For printing, I use the original size and 300 dpi which is probably overkill).  After you resize, you need to sharpen most images.  Upload to blogger from a file on your computer, not flickr or Picassa, etc.  After you've uploaded to blogger, go to the 'Edit HTML' tab.  You will see about 4 lines of computer code identifying your photo.    Toward the end you will see  /s320/
Change this to  /s900/
You may also have to find the width and height codes and change them to your exact photo dimensions.
This should make your photo BIG and BEAUTIFUL!  (If anyone still has problems, send me a comment or an email and I'll help you figure it out.)  I'm looking forward to seeing more of your big and beautiful photographs!

Monday, August 30, 2010

Feeling Like Fall

FALL WILD FLOWERS AND WEEDS
I took this photo several years ago.  This lovely scene was in a ditch by the side of a two lane road and directly  across the street was an ugly junk yard.   It is close to home so in the late summer/early fall I would drive by and usually find a good photo op or two.  Now they're in the process of building a new highway there.  The good news is that the junk yard is gone.  The bad news is that so are these wonderful wild flowers!  P.S.  If you like the perspective, and it looks a bit different to you, check in tomorrow on Tech Talk Tuesday, and I'll explain how I set up this shot.  Also, I've had several people ask how I get my photos so large on blogger.  I'll explain that too.

Sunday, August 29, 2010

Back Home and Broke!

That's what my Dad used to say every time we got home from a vacation.  Anyway, it's good to be home, even though we had a wonderful time.  There was lots of laughing, teasing, playing games, water sports, eating, relaxing, fun family memories... everything that makes for a great family vacation! 

In honor of 'Sunset (Sunrise) Sunday', here is a photo I think I actually took last Sunday.  This is the view I had from my bed at the back of the houseboat.  I'm an early waker upper, so every morning I'd look out the sliding glass door to see if there was a sunrise worth getting out of bed for.   Definitely a 'yes' for this one!  I had to walk about 5 steps to the back of the boat to take this photo.  The brilliant color lasted only about a minute before it faded, and since I was the only early riser in the group,  I was the only one who got to start the day with this inspiring scene. 

Sunrise at Lake Powell - 2010

Saturday, August 28, 2010

Until Next Time....

I'll end this Lake Powell photo tour with another of my favorites.  This is more like real photography, where most of the other photos have been family snapshots.  This morning the clouds were beautiful, with sun rays peeking through and turning the water gold.  A perfect shot to enhance with a bit of HDR.  I have to add something about Lake Powell skies.  At night when it is clear, as it most always is, we lay on our backs on the top deck and watch the best show ever.  The sky is very, very dark (no city lights for miles), and so you can see millions upon millions of stars and constellations.  The milky way is amazing, the north star brilliant, the big and little dipper are easily spotted.  And almost every night you can see one or more shooting stars.  Now that is relaxing!!!  

Friday, August 27, 2010

Taking a Stroll


Sometimes in the afternoon we'll stroll along the shore, visit with our neighbors, build sand castles or play games in the sand.

Thursday, August 26, 2010

Yum!

If we are not in the water, or relaxing with a good book, or playing games, then most likely we are eating!  All junk food is acceptable and encouraged at Lake Powell.  One week of junk food can't hurt, can it???? (This is Tyler's Emily.  They had just started dating.)

Wednesday, August 25, 2010

Heavenly Water

This is what every water skier dreams of - water as smooth as glass!