Tuesday, July 6, 2010

Tech Talk Tuesday, Part 2

As a follow up to my last post, I'm going to show you just a few examples of why you might consider shooting in Manual mode, AV mode, or TV mode.

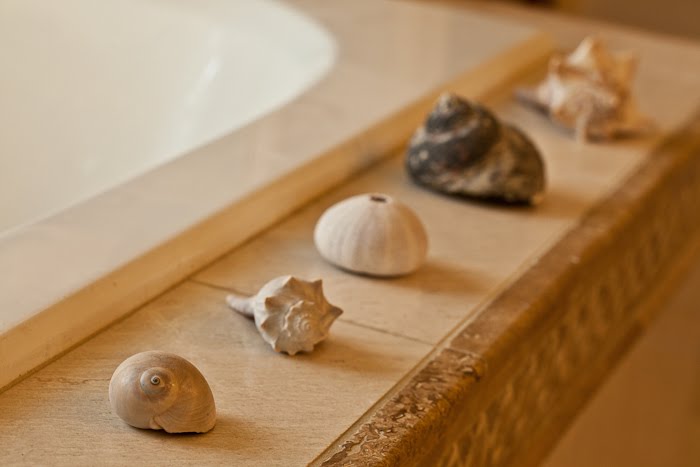
The first group of photos is a simple way to help you understand depth of field and how much more creative you can be if you shoot in Manual or AV modes:
Program Mode - camera chose Aperture f/3.5  Shutter 1/125
On all these images I focused on the first shell.  When I let the camera do the thinking, it decided that I wanted only one shell in focus and everything else blurry, so that's what it did.  That's o.k. if that's what I really wanted.  But what if I wanted to see more of the other shells?

AV Mode - Aperture f/8  Shutter 1/20
I changed from Program to AV mode.  I knew that if I chose a small aperture number, the back shells would still be blurry, so I picked a larger number and then the camera set the appropriate shutter speed to make a correct exposure.  Hmmm, the shells are clearer and I like this better, but I was really hoping to see all the shells clearly.  (As a side note, what do you notice about the shutter speed the camera selected??  It's pretty slow.  I'd have to have a really steady hand to hold still long enough so the image wouldn't be blurry.  Best option would be to use a tripod, which I did.)

AV Mode - Aperture f/32  Shutter 1/0.8
Now I turned the aperture wheel to the largest number I could, to get the greatest depth of field I could.    Remember the bigger the aperture number, the smaller the hole to allow light in.  In order to get enough light through that small hole for a proper exposure, the shutter has to stay open a long time - a slow shutter speed.  The shutter stays open so long, that I absolutely must use a tripod.  Now this is what I envisioned when I set up this shot.  Can you see that I couldn't achieve what I wanted if I'd just shot in Auto??

(For those pros out there who are worrying that I haven't talked about all the other factors that affect DOF such as what type of lens I was using, how close to the shells did I placed my camera, did I consider hyperfocal distance, etc.,  remember I'm starting with very simple basics.  All that will come later!)

Here's two more photos to help you understand why a manual mode might work better for you:
Have you ever wondered why sometimes your pictures come out underexposed when you have it on the same Auto mode as when you took a previous shot and that shot was fine?  This often happens when the majority of your composition is white or very bright, like a huge white wedding dress or a winter landscape filled with snow.  The dress, the snow and everything else turns out looking dingy and underexposed.  Here's a very brief explanation.  Your camera on Auto mode is programmed to expose pictures to the value of 18% gray overall because percentage wise, most pictures have light, dark and medium light values that probably average out to 18% gray.  This means that if your camera sees a bright white dress dominating the picture, it assumes the scene is overexposed and you really don't want that much bright white.  So it reduces the exposure to compensate - and tadaaa, you get dingy gray instead of beautiful white.

When you do the thinking, instead of letting your camera do the guessing, you will learn how to compensate for this problem by purposely overexposing your shot to come out with the exposure you were looking for.  Incidentally the same thing is true for the opposite problem.  If you wanted to take a picture of your cute black cat, sitting on a dark sofa, the camera on Auto mode would assume that your shot was underexposed, and would lighten it up.  You then would have an 18% gray cat on a medium colored sofa!!
(Side note off the subject for you wedding photographers.  If you have a really cluttered background and can't find a decent setting, and your bride has a really full dress, and you have a girl assistant to help you, use her dress as your backdrop.  This has saved me many times, and the brides love it!)

Here's another scenario.  Your kids are playing and doing funny stuff.  You want to remember the moment so you grab your camera and shoot.
First of all I have to say that those days really are just memories for me.  Now I grab the camera for the grandkids.  But for this post, I just went outside and snapped a shot of my son walking to the house.  This is a definite  'hit the delete' photo.

  If I had a second to see that the Auto mode set a shutter speed too slow to freeze him walking, I could have quickly flipped to TV mode (shutter priority), and set a faster shutter speed and ended up with a reasonably sharp photo.

And finally, and most important to me, shooting in Manual allows you to be creative and end up with pretty pictures:
SOOTC (Straight Out Of The Camera) shot in Auto
The camera chose f/3.2 aperture and 1/50 shutter speed
This is not a very inspiring photo.  The camera underexposed the shot, probably because I had my spot meter focused on the water.  (I would have gotten a better exposure if I'd used evaluative metering. ) Even if this was properly exposed, it is destined for the garbage.  But I have learned to better expose, but also to use my camera settings in manual to create a more interesting waterfall shot called veiling.  This is a very common technique and easy to do.

 TV Mode - I choose a shutter speed of 1 second and the camera chose the aperture of f/13

 The trick is to set a slow shutter speed to blur the water which creates a dreamy, cotton candy look.  Of course you must use a tripod, and the scene must be dark enough to allow for a slow shutter speed.    I took both of these shots yesterday in about 3 minutes.  I hope the second one is good enough to be a visual argument about why you should at least try manual, AV, or TV modes.  Scott mentions in his comment on the last post, and I concur, that in addition to shooting in the manual and semi manual modes, there are numerous other ways to manipulate how you use your camera to allow you the most creative options.  The key is knowing what these options are, then choosing the method that is best to achieve the image you want to make.  I can tell you that taking control of my camera, and showing it who's the boss (sometimes) has allowed me to do so much more with my photography and I've never turned back.  I hope I've given you beginners some encouragement to take that leap and I'd love to hear how you are doing!

P.S.  I apologize to some of you who have made comments because they are not showing up on the blog.  I have no idea what is wrong!!

Monday, July 5, 2010

Tech Talk Tuesday

 IS IT TIME FOR YOU TO START SHOOTING IN MANUAL MODE????
(I think it is!)

Before you tackle this post, please read the previous post as a 'forward' to this one.


As I began thinking about where to begin, it became obvious that there is no way to tackle this subject in one brief post.  There are tons of books, websites,  classes that explain 'why' it is to your advantage to shoot in manual and, 'how' to do it.  As many of you who are already shooting in manual read through this post, you will be thinking, "Well, duh, that's obvious!"  I'm remembering, though, how confused I was when I picked up my first SLR, tried to learn it all, and then, tried to remember it all while I was shooting.   So I know that for many, it is NOT that obvious, and that's who this post is for.  So for those of you who have this all down pat, please contribute your comments and help us all learn.  Here we go.....


First of all, let's take a minute and define our terms.  (A good suggestion from Scott.)  For purposes of this discussion, shooting on ''M' for manual means that you set the aperture and shutter speed individually.  'AV' (stands for aperture priority on Canon cameras), and means you choose the aperture and the camera chooses the correct shutter speed for a properly exposed image.  'TV' (stands for shutter speed on Canon cameras), and means you choose the shutter speed and the camera chooses the aperture to make a  properly exposed picture.  These three settings can all work well to give you the most out of your camera and the most creative options.   Now the auto settings.  The 'green box' setting works like a point and shoot and assumes you know nothing so it makes all the decisions. The 'P' program mode lets you make some decisions, like exposure, white balance, ISO, etc.  Then all the pre programed modes, such as a little picture of a mountain, or flower, or a person running are trying to guess at the best settings to use for specific kinds of subjects, i.e, landscape, macro, sports, etc.  I'm going to take a stand and say that most of the time you will get better images if you use the M, Av, or Tv settings and stay away from the auto settings.  This is because the camera is just guessing at what would generally work, and doesn't know what you have in mind! 


I think there are many photographers with great potential who improve to a certain point, then get frustrated because they don't seem to go beyond that certain point.  Often the stumbling block is the technical side of photography.  Many of us photographers became interested in photography as an artistic outlet.  We love to compose beautiful landscapes, love capturing the romance of a wedding, love telling a story, etc.  We really couldn't care less about how a camera works.  Then there are the techies who know every aspect of their camera, have all the latest gizmos and gadgets and can take a technically perfect picture, but maybe it lacks emotion or interest.  Finally, up there on pedestals,  are the lucky ones who have a good combination of both skills.  Well, I'm not one of those types.  I'm the artistic type and still struggle to learn the ins and outs of how my camera works and how the camera settings affect the look of my images.   As hard as this was (and is) for me,  I knew I had to learn if I wanted to make pretty pictures, so I persevered to a minimal degree of competence.  And this is my first, and most important point to you confused beginners.  You are not stupid!  Learning the basics is confusing at first, but not difficult, so you can have confidence that the light will eventually come on.  I promise you are not trying to learn something akin to quantum physics.  Something else I found encouraging is that you don't have to know everything there is to know.  Just the basics will help improve your photography by leaps and bounds. 


The second point which is equally important is that you MUST be willing to put in the time.  Like anything else you want to be good at, you must read, take classes, learn from others, and practice, practice, practice, practice, etc. etc.  If you aren't willing to do the time, you won't learn, and if you don't practice, you won't remember.  So here is a good place to start.  I've found a website that does an excellent job of explaining the basics of aperture, shutter speed and ISO in a short, simple, and concise way.  Understanding these three concepts is the foundation, the basics.  Once you know how these three camera settings interact, you will begin to see how manipulating them can help give you the image you want.  Click HERE for Part 1, and HERE for Part 2.  It might be helpful to read and study these articles before continuing with this post.


So you've read these articles numerous times until you kind of understand the concepts, but it's still confusing.    Early on I was so confused about how it all worked.   When someone said, 'shoot wide open' or 'stop down' your lens I couldn't figure it out.  Sometimes I still have to stop and think about it.  The bigger the number, the smaller the opening.  Think, think, remember.  Whose idea was it anyway to make this so confusing.  Then it finally hit me.  When I began thinking about the f stops as fractions, it all made sense.  So instead of f/4 or f/8 or f/22, I began changing the 'f' to a '1', so then I have 1/4 or 1/8 or 1/22.  Of course 1/4 (of say a piece of pie) is bigger, (a larger opening) than 1/22 of a piece of pie, (smaller piece of pie and opening.)   I know, I know, this is where you experts are saying 'Duh!'  But really, this was a break through to me.


So after reading the above articles you now have a basic but fuzzy understanding of aperture, shutter speed and ISO, but how does the 'theory' turn into 'practice' when you pick up your camera.  How do you know where to turn the knobs????  When someone first told me I needed to be shooting in manual, I turned the knob to 'M' then started shooting.  I couldn't understand why everything was blown out.  I finally figured out which wheel changed the shutter speed and which one changed the aperture, but no matter how I turned them the exposure was way off, or the picture was blurry.  Finally, at a workshop, someone physically showed me how the manual mode basically works.  I had no idea I was supposed to be looking at that little light meter at the bottom of the view finder.  I was shown that I needed to change the aperture and the shutter wheels until the little pointer was in the middle, indicating those settings would give me a proper exposure.  (See, I told you I was really slow in the technical area!)


The next break through came when I realized that different combinations of aperture and shutter speeds would also produce a proper exposure.  Well, if they all give a proper exposure, why does it matter which combination you use???    I learned that different combinations will change how my image looks.  As a beginner, the most important types of shots I cared about were:  (1) I wanted to shoot landscapes where everything was sharp and in focus from the flowers a few yards in front of me, to the mountains many miles away;  (2) I wanted to shoot portraits where the people were in sharp focus but the background was soft and blurry;  (3)  I wanted to shoot my kids at their sports events so they were sharp and not blurry.   I was pretty basic in my goals back then.  


Just as a simple starting point here you go:  (1)  To shoot landscapes, the bigger the aperture number such as f/11, f/22, (which means a smaller opening), the greater will be your depth of field, meaning that both the foreground, middleground and background will be in focus.  So starting in AV mode, I would set the aperture to the largest number that my camera and lens would allow me to set.  Remember the camera will set the shutter speed to get a proper exposure.   (If the pointer on the light/exposure meter is way to the right or left and blinking, you will not have a  proper exposure, so you could readjust your aperture setting to fix the problem.)  (2)   To shoot portraits with a sharp foreground and a soft background, start in AV mode and choose a small number such as f/2.8, f/4, (which means a larger opening),  and you will have a shallow depth of field.  (Same as above applies with automatic shutter speed and the blinking light meter.)  (3)  To shoot kids in action you must have the shutter open and close very fast to freeze the action so your image is sharp and not blurred.  So the shutter speed is most important.  Switch to TV mode and set the shutter speed to, say 250, and let the camera select the aperture for a properly exposed shot.  These simple basics will help you to first determine what you want your image to look like, then know how to adjust your camera settings to achieve it.


There are many, many other things to take into consideration that I just can't cover here, but know that the type of lens you have, your ISO setting, whether you are shooting in bright light, will all have an effect on the aperture and shutter combination you can use to obtain a proper exposure.  Two more basic bits of information.  It is very difficult to hand hold a camera and obtain a sharp image at a shutter speed less than 30.  Any less than this, and you need a tripod.  And typically, your shutter speed shouldn't be less than the focal length of your lens.  A quick comment about ISO.  The lower your ISO, the less 'noise' you will have, and, conversely,  the higher the ISO, the more noise you will have, but, a high ISO will allow you to take photos with less light, meaning in a dark room or in the evening.


And finally we come back to the big 'M' mode.  Eventually you will look at a scene and take a good guess at where your settings should be.  Until then, here is what I do.  I put my camera on 'P' for program mode.  I compose my shot and look at what the camera has chosen as the settings for a proper exposure.  Then I switch to manual and choose those same settings and take a practice shot.  This gives me a starting place.  Then I decide what I want the image to look like.  If I'm shooting a landscape and want great depth of field, I turn the aperture wheel to a larger number (which in reality is a smaller opening), then adjust the shutter wheel until the pointer on the light meter is somewhere in the middle indicating a proper exposure.  I really still say to myself, "big number for aperture equals big depth of field".  If I want a nice blurry background I start with a small aperture number (which makes a large opening), and experiment until I get just the right amount of blur.  For me, it is still a learning experience.  And thank heavens for digital, where we can immediately review the histogram and immediately see the effect our settings have on our image.  Then comes, practice, practice, change settings, practice, practice, read and memorize your camera manual, practice, practice, take some classes, read some books, talk to other photographers, repeat, repeat.

Other ideas to get you motivated
1.  Join your local camera club
2.  If you own a popular camera, go to your local big box book store and purchase books specifically designed to elaborate on the information found in the manual that came with your camera.  A well know publisher of these books is Magic Lantern Guides.  The first thing I do when I get a new camera is to buy several supplemental manuals.  They go into great detail about how to use your camera.
3.  Find a 'photo buddy' in your area to go shooting with and to share information with.
4.  Find someone in your area who knows more than you do and ask if he/she will mentor you.  He/she might need a willing assistant to pack gear or hold reflectors in exchange for seeing first hand how he/she works.  
5.  Check out your local camera club, photo finishing labs, camera stores, professionals and get on their mailing lists for upcoming classes and seminars.  I have learned so much for a very little monetary investment this way.

Well, it is after 2:00am in my neck of the woods, and I'm starting to see double.  I was going to end this post with several images that show the difference between shooting in auto, and how different they look adding a little creativity and shooting in manual.  I promise to do that in tomorrow's post.  I know this post only covered a few pointers, but I truly hope there was at least one idea, or thought, or bit of information to help you feel confident enough to try that manual mode,  (or AV or TV).  I'd love to hear your progress, and I'm more than happy to answer individual questions as best as I can.  Either leave a comment or send me an email.  And, we'd all like to hear any additional suggestions for beginners from all you experts out there.   And now, good night!!!          


MANUAL vs. AUTO??????

FINALLY taking that big step......turning your camera dial to Manual...YIKES, WHAT HAVE I DONE!!

Today I got a great email from a new photographer friend.  Here is her note:  "I ran across your blog a couple of months ago.  I have since been following it and I really enjoy your pictures and the information you share.  I have a question.  I have taken pictures for fun for a long time.  But I have always just stayed in auto.  At Christmas I took the plunge and bought a Nikon D90.  I love it and have so much to learn!!  Do you have any advice for me as to how to start shooting in manual?  I have been reading about aperture and shutter speeds.  But when I am out and trying to take pictures I struggle with getting out of the programmed modes because I get overwhelmed with knowing where is a good stating point and what should I do from there.  Is there a standard place to start and then change things accordingly?  I know I can do this if I can just get past the overwhelming feeling of where in the world do I begin?  Thank you for caring enough to allow us to ask questions.  I look forward to your reply."

 As I was thinking about how to respond, I decided that probably 90% of 'photographers', (rather than snap shooters), could have written this same thing.  We all buy cameras, usually for the purpose of recording family memories and vacations.  We may even decide to snap some beautiful flowers or a friend's new baby.  We find the little green square that means 'auto',  and start snapping away.  Most people are content with this and are using their camera as anticipated.  But some of us look at our snaps and think, "humm, how come my photos don't look like the ones in the magazines", or "I wonder how so-and-so made her flower pics look so much better than mine??"   And that's how the addiction starts.  It's all so innocent in the beginning.....I'll just read my camera manual and see what it says....  Well, maybe I'll stop by the library on the way home from work and see if they have any photography books....  I'm only going to spend ONE hour on the internet reading about photography instruction, then I'll get dressed and clean the house!  And before you know it, you begin carousing the streets in front of your local dealer, and finally come home with a $2,000 habit, (in my case a Canon 5D Mark ll).  But, you rationalize, I can stop at any time!  Yeh, right says your family and friends.

I'm sorry, I just got carried away, and chuckling so hard to myself I couldn't stop.  (They say the first step to recovery is to admit one has a problem.  But if my husband is reading this, I'm NOT admitting to anything!)

Back to the purpose of this post.  At some point, most of us who call ourselves 'photographers' were probably casual point and shooters who became fascinated with taking pictures and wanted to learn how to do it better.  From then it doesn't take long before you learn that most great photographers learn to shoot in 'manual' modes, because often, this is the secret for getting your camera to record an image the way you actually see it or want to see it.  But shooting in manual is a BIG leap for many of us. 

I thought this would be a great topic for a Tech Talk Tuesday, so I asked my new friend if I could quote her email, and then we will have a discussion on how to make that leap from auto to manual tomorrow.  So tune in tomorrow for this discussion, and please join in by telling us how you made, or are in the learning process of making this transition!! 

Sunday, July 4, 2010

PROUD TO BE AN AMERICAN!

For Love of Country - Grand or Humble
Six years ago we took our first trip to the east coast.  We had an amazing 2 1/2 weeks and saw so many wonderful historic sites and sights.  One place that was truly impressive was our tour of Gettysburg.  There was a reverence and awe in this sacred place.  We viewed hundreds of impressive statues and huge monuments honoring the brave men who fought for what they believed in as we walked on the very fields where they battled and died.  We read the plaques and learned of the sacrifices they made.   We toured Boston and were even more moved as we  remembered all the extraordinary and famous men and women we've read about in history books, who sacrificed their all to give us freedom.  Again we walked where they walked and saw many beautiful statues and monuments with plaques memorializing their brave contributions.

Then, on the outskirts of an area where so much of these early events took place, we ran upon this small, unmarked cemetery.  Most of the markers were of this same era.  No big statues or plaques, but one simple American flag beside a grave.  Somehow this struck me as even more poignant.  I thought about the thousands or hundreds of thousands of brave and patriotic men and women there have been throughout American history who have also sacrificed their all and who have also loved this country as much.   And for the most part, their stories are untold, and these are the backbone of this great nation.

I quote the chorus from one of my all time favorite patriotic songs by Lee Greenwood that never fails to bring tears to my eyes:  "And I'm proud to be an American, where at least I know I'm free.  And I won't forget the men who died, who gave that right to me.  And I gladly stand up next to you and defend her still today.   For there ain't no doubt, I love this land, GOD BLESS THE USA!"

Happy 4th of July!

Friday, July 2, 2010

Phriday Phun

Clown - Downtown San Jose, Costa Rica
I was Caught in the Act....of Taking a Picture
A couple of posts ago I revealed my fear, and ongoing attempts to reach out to people, learn their stories, and document with my camera.  I said, no fair snapping candids long distance.  Well, now I'm going to contradict myself, (my husband says this is not unusual).  Anyway, sometimes a story is best told when your 'subject' is about his business and does not know he is being observed.  (I guess I better put in a disclaimer here.  I'm obviously talking about observing people in public, and not  something weird like becoming a 'peeping tom'!)  Moving on, we were in downtown San Jose, and several clowns were entertaining children in the town square.  That is, all the clowns were entertaining children except for one.  I noticed this clown was not paying any attention to the children, but was paying a lot of attention to the ladies.  He caught me just as I snapped this candid.  I just waved and went on my way.   

Thursday, July 1, 2010

July Desktop Image

Beautiful Arenal Volcano at sunset - Costa Rica
Here is my July desktop image for you to download, share and enjoy.  Just click HERE then right click to set as your desktop image.   It should not be pixalated or blurry.  If you have problems, let me know and I'll help.

Last November Jeff and I took a most memorable trip to Costa Rica.  Yes, it was this green and yes this scene did look like what I imagine Shangrila, Paradise and the Garden of Eden would look like all rolled into one.  The clouds are a combination of clouds and steam/gas  escaping from the volcano.  We could hear it rumbling at night, accompanied by the sound of howler monkeys in the trees.  This photo was taken from the balcony of our motel room,  and we were actually closer to this active volcano that it looks.  I wanted to include the beautiful sunset sky and the lush vegetation, so I used a wide angle lens, which, as we know, distorts perspective. 
 

Wednesday, June 30, 2010

Wednesday Workday (Interesting People in Their Environment)

Primitive Wood Carver - Costa Rica
I haven't done a 'Wednesday Workday' for awhile, so it's about time.  As I was choosing a photo for this post I began reflecting on something another photographer said that made a great impression on me.  He had spent 10 years photographing waterfalls, sunsets, barns, flowers, lighthouses, mountains, etc., and then one day realized something was missing and he was bored.   He wasn't being challenged anymore because he had mastered his camera, understood exposure, lighting, composition, etc., and pretty much knew exactly how his images would turn out.  He became tired of producing yet another glorious sunset.  He realized what was missing...the human element.  When photographing people there are always challenges, surprises, and varied outcomes.  When he started doing character studies, his skills improved because he had to go way beyond just the technical aspects of taking a properly exposed picture.  He had to overcome fear and reach out to people.  He had to become a communicator.  He learned to be genuinely interested in the people he photographed, and in turn they, allowed him into their world.  Then he had to compose a picture that not only reflected the personality of his subject, but would tell the viewer a story about the person as well.  (In other words, no sneaking candids with a telephoto lens!)  I don't have anything against landscapes and still life (you can tell that by many of my posts), but I think he is right.  Several years ago I began to force myself to go out of my comfort zone to met interesting people, build rapport by being genuinely interested, and hopefully gain trust so I feel comfortable asking if I could take their picture.  It has been so rewarding and I love the photos I have taken where I feel I've done a good job of capturing a bit of a person's life.  We stopped at this man's little roadside stand in Costa Rica.  He was very proud of his work, and was especially proud that 'someone' had discovered his talent and had some of his pieces in a little art gallery in southern California.  He took out a very worn out and torn newspaper article someone had written about him and was so pleased when we took the time to read it.  He talked about how he became a wood carver and his life style in Costa Rica.  He was proud of how well he spoke English.  He very graciously said I could photograph him.  I was really proud of myself for not just pulling out my camera and taking a quick snapshot.  I kept my wits about me and asked if I could take a picture of him actually carving wood.  He even moved as I directed him, so that I could show his work as part of the background.   Meeting and photographing the interesting people who cross your path will stretch your abilities and skills as a photographer and you will be richly rewarded in the process!     

Tuesday, June 29, 2010

Tech Talk Tuesday

Deep Thoughts About Photography
Well.....maybe not too deep, but a few thoughts anyway.  The digital/computer age has changed the face of photography forever.  Most of us have embraced this brave, new world, but I still run into some who insist that 'real' photographers shoot film and avoid the computer like the plague.  Others have grudgingly switched to digital but insist that any type of computer manipulation is cheating.  They inspect fellow photographers' work with a fine tooth comb for any hint of special post editing, although most will hesitantly accept a crop or exposure adjustment, or of course B&W or sepia.  In the old days, even though there was dodging, burning, retouching, and other editing, it was difficult and time consuming and kept to a minimum.  Now, with the click of a mouse, not only is traditional photo editing done in seconds, but there is a whole new world of textures, actions, effects, plugins, programs, readily available to all who wish to learn and use.  Where a photograph used to pretty much start and end as a photograph, now an artist can use a photograph as a starting point, and end with a beautiful work of art that may or may not look anything like the original photograph.  And that is O.K. !!! Artists, if they wish, can now use cameras, computers and a mouse or wacom tablet in place of easels, brushes and paints.  Photography is art and is represented as the artist sees it, whether realistically, surrealistically, abstractly, impressionistically, (is that a word???), etc.  Most of us love the freedom, creativity and fun this new age of photography has brought us,  (and is there a wedding photographer alive who hasn't thanked his lucky stars on occasion when she was able to retrieve that ruined, once in a lifetime shot, with the help of Photoshop or some other computer program!)   So, when people ask me if I have 'Photoshopped' my photos, I readily say "Yes, all of them, (except those taken for photo journalistic purposes.)   Some are edited just a little, and some a lot!"  It's all a matter of preference........
            A little sharpening and exposure correction


Heavy vignette and more sharpening


Red channel B&W & several textures


And my favorite..... several textures, slight vignette, sharpen, vibrance

Saturday, June 26, 2010

Lights Peas....I mean Please!

A Chorus Line of Peas
I went out to pick peas early this morning, and the sun was shinning just perfectly to light up these sweet little peas in their pods.   Sure made it easy to spot them!  Now if only I could think of something profound to go with this photo.   Hummmm.....how about.......   "This little light of mine, I'm going to let it shine."  Nope, too corny.  (I bet Stacey Dawn would have the perfect quote!)

Friday, June 25, 2010

Phriday Phun


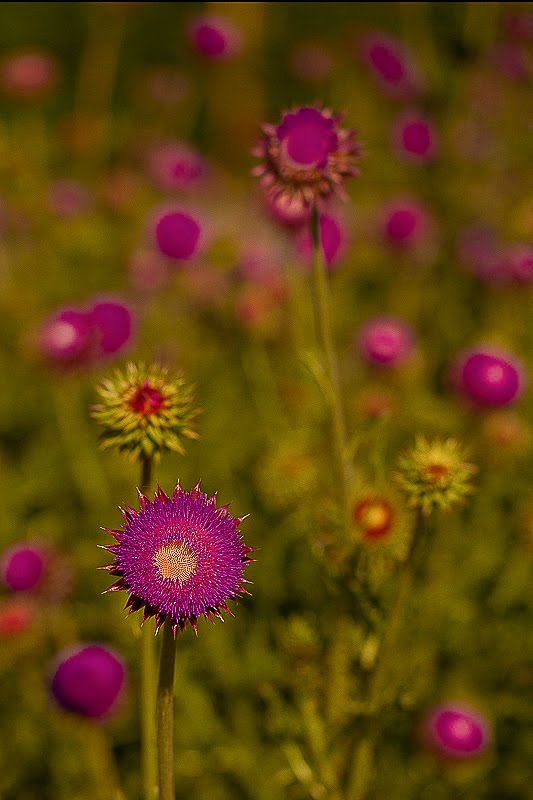
BEAUTIFUL WEEDS
I think as a 'group,' we photographers tend to be more observant of our surroundings.  We often see details and beauty that others miss.  We are always looking for something beautiful, unique, funny, noteworthy, etc. to capture and preserve.  When I photograph landscapes and nature I have a greater appreciation and reverence for this beautiful world, our divine Creator, and all his amazing creations.....flora, fauna, human, etc.  When I photograph people, I am really focused and in the moment, and so I gain greater insights into peoples' personalities, uniqueness, and have greater empathy and understanding for their life circumstances.  Being a photographer has taught me to be more grateful, more observant, and to take the time to find beauty each day.  Which brings me to this picture.  These are weeds growing right by the curb on a vacant lot on my street.  This spring I've watched the weeds get taller and taller, and would think it will sure be nice when someone builds a house there so that vacant lot wouldn't be such an eyesore.  Then a couple days ago, on my way rushing to an appointment, I saw this flash of magenta color out of the corner of my eye.  I stopped for just a minute to discover the 'flowers' of these weeds had popped open and they were interesting and, yes, 'beautiful'.  I impatiently waited until early the next morning when the light was right, to capture their beauty.  While I was doing so, several of my neighbors who were rushing off to work, drove by, and I'm sure they thought I was nuts standing in a bunch of scraggly looking weeds with my camera.  But I bet if they saw these photographs, they would have no idea this is what they were driving by every day!!!  When I downloaded these photos and saw how 'beautiful' they were.......that was PHUN!

Wednesday, June 23, 2010

A Bit Edgy???


Sooooo, as I'm composing a photo, I'm always on the lookout for something that will cause one to take a second look and hold their attention a bit longer.  Awhile back, Chad gave me the greatest compliment when he said that he often goes back to look at a particular photo of mine.  (Thank you, Chad, that just made my day!)  When I'm out and about, I'm always looking for unique settings to use for portrait photography.  Currently, where I live, there is major construction on the roads, and stockpiled right off a freeway on ramp were these huge cement pipes and cubes - I guess for a drainage system.  After we did the more traditional engagement shots last weekend, I told my son and his fiancee, I wanted to do something different.  They decided to change their clothing, and their monochrome outfits looked perfect for what I had in mind.  We pulled off the highway, and immediately saw a sign that said, 'no through traffic, no public parking'.  My son said this was just a 'suggestion' and didn't exactly say, 'no trespassing' or 'if you enter and take photographs here you will be carted off to jail', so we took our chances.  By now it was totally dark, so my off camera lighting was my car headlights.  Kind of edgy, kind of editorial, kind of high fashion?  I don't know exactly what the right adjective is to describe these shots, but I really like them.  But the real question is,  do they make you want to take a closer look????? 

Tuesday, June 22, 2010

Sometimes It All Comes Together!

Tyler & Emily
I've been busy this month with family weddings and all the excitement that goes with these wonderful events.  This past weekend was my son Tyler and his fiancee Emily's turn for engagement photos.   We took a ton of photos in numerous locations and ended up with lots that I love, but sometimes it all comes together perfectly for one that stands out above the rest.  This one is my favorite.  I love the colors, the composition and especially the background and setting that are so complimentary.  Love the pop of the color in the poppies that match Emily's blouse, love the out of focus background that matches Tyler's shirt (it's sagebrush), love the 'lacy' foliage and love the off camera lighting.  This was taken at dusk, 1/60 sec, f4.5, off camera flash on manual.  (The only thing that is irritating, is often when I upload to blogger it washes out my photos.  When I resized for the WEB I had to really reduce the exposure and even doing that, this photo does not have nearly the pop that the high resolution original has.  Does anyone else have this problem?)

Sunday, June 20, 2010

Sunrise, Sunset

LAKE POWELL

Last Friday we got together for dinner with our friends to make plans for this years Lake Powell trip and to reminisce about the fun of last years trip.  It is wonderful to anticipate fun vacations with family and friends, especially when we have so many memories of this place.  So I thought it would be appropriate to post this photo for Scott's  Sunset Sunday posts.  It was taken from our houseboat, but the secret is, this is really a sunrise, not a sunset.  (Hope that doesn't break the rules, Scott!)

Saturday, June 19, 2010

Unexpected Insight

When we look at the world around us in the same old way, we have the same old impressions, the same views, the same perspectives, etc.  In photography, we often try to find a different angle or a unique view, to make a picture more interesting by revealing or emphasizing hidden or not often seen details.  Isn't this true in life?  When we take a different path on our daily walk, we see a fresh view of our own little world.  When we try to resolve a problem by a method not used before, we get a surprising result.  When we really strive to understand another person's differing opinion, our capacity to love and be loved grows.  It's a beautiful weekend, (at least in my neck of the woods), so take your camera and find something you commonly see, then look for a new perspective and a different view!  

Friday, June 18, 2010

Phriday Phun

The Many Faces of Sawyer
(AKA... Soybean, Soysauce, Soyboy, DinoSawyer, TyranoSawyer Rex)


SAWYER IS ONE!
Actually the PHUN was yesterday when I took these photos.  He is such a little character and I got so many cute shots with so many phunny expressions that it was hard to choose which ones to post.  Grandma LOVES you Sawyer!!!!

Thursday, June 17, 2010

Sneak Previews


Daniel and Kenzie
I've not been posting this past week because I've been busy with wonderful family events.  Here is a sneak preview of Daniel (nephew), and MacKenzie's wedding.  They wanted a 'country/vintage' wedding and it was beautiful.  The reception was held in a barn on a historic farm.  The tables were decorated with antic bottles, yellow wildflowers and lemon drops.  There was lots of laughter and dancing.  It was a wonderful celebration!


Michael and Diana
Then we had a double bridal shower for my nephew's fiancee Diana, and my son Tyler's fiancee, Emily.   Several days later I took engagement photos for Michael and Diana, and I'll take engagement photos for Tyler and Emily this weekend.  And today I get to take one year portrait photos for my grandson Sawyer. 
Nothing is more satisfying for me than using my hobby to preserve memories for family and friends.

Friday, June 11, 2010

Phriday Phun


THE FREMONT EXPERIENCE
For those of you not familiar with Las Vegas, this is in the old part of town, where they have completely enclosed a street and made a huge screen/light show overhead that goes for several blocks.  If anyone wants to remember their wild past of LSD and the psychedelic subculture, (I hope not...), but if so, this would be the place to do it.  And judging by the characters we saw here around midnight, I'm sure there were some living in the past and in the present.  We only stayed long enough to see this light show, and it was amazing!

Thursday, June 10, 2010


Casto Canyon
We took a quick trip to St. George last weekend for a 'reunion' with 2 former business partners of mine.  Of course we brought the RZRs, and on the way home we took a detour to get in a quick ride.  We ended up seeing some of the most spectacular redrock we have seen to date.....absolutely breathtaking! What makes redrock even more beautiful for me, and not as common, is to have the contrast of pine trees and other spring green trees.  And even though, yet again, I was shooting in mid afternoon, the reds, oranges, greens, and blues were just vibrant.  I could never have gotten these shots without using a polarizer and being careful with the angles and directions I was shooting in relation to the sun. 


Wednesday, June 9, 2010

Sawyer is ONE!


HAPPY 1st BIRTHDAY, SAWYER!!
Not only was this a Happy Birthday celebration, it was a 'Hurray, I'm Not Allergic to Milk' celebration.  Sawyer's big brother Gavin, (our angel in Heaven), was allergic to milk and eggs so we celebrated his first birthday with rice krispie squares.  Michelle had not given Sawyer any milk or egg products until last week.  Then tentatively, she started introducing a few items with minimal milk and eggs.  Finally she gave him a tiny bit of cake and frosting.  But the big test was his birthday cake, and WOOHOO, whether in his tummy, in his eyes, or smeared all over his hair and face, his birthday cake liked him as much as he liked it!!

Tuesday, June 8, 2010

Tech Talk Tuesday


FUN with FLARE 
(I haven't done a Tech Talk Tuesday for awhile, so thought it was time.) 
 
Usually bright mid day sun is our enemy.  For landscape photographers, it produces harsh, flat light.  For portrait photographers, it produces harsh, flat light.  If we are shooting on a bright, sunny day, we use a lens hood, polarizer, neutral density filter, whatever we can, to tone down the light.  Sometimes, however, it's good to think outside of the box.   Including the sun or lens flare from the sun, can become part of your composition.  In the above photos, I've used lens flare to emphasize, or give weight to the main subject of the photo.  It's fun to experiment and see how you can use the sun to change the mood and feel of a photo.  I've discovered, however, that using lens flare as a composition element is a very individual thing.  Some people love it, and others hate it, but it's worth a try......you might be surprised with the results!   

Monday, June 7, 2010

JOKE'S ON ME!!!!!

Thanks to Rick, for giving me my laugh for the day.  First of all, if you haven't already done so, check out my most recent Phriday Phun post.  If you notice, Rick made an interesting comment.  Since then we've exchanged a couple of emails, where he informed me that when he hovers his mouse over each photo, the file name appears in the bottom left corner of his screen.  Sure enough, when I tried it, the file name appears in a bar in the bottom left corner of my screen.  And, of course, the file names are what the photos are about!!!  HaHa  My guessing game should have been about who is the most observant, including me!  I told Rick, instead of pointing this out to me, he just should have 'guessed' them all correctly, and we all would have been SO impressed.  Anyway, thanks Rick for making my day!!
P.S.  Just in case this doesn't work for everyone, here are the answers:
1.   edge of pizza cutter
2.   plastic scotch tape dispenser
3.   tomato slice
4.   electrical outlet cover plate
5.   candle wick
6.  edge of soda cracker
Now that you know, they're obvious....right???

Exotic Flower #8

Are you tired of exotic and unusual yet???
I have more, but I think it's time for a change before we all get bored!  Tomorrow....... something different, and because I'm such a fickle fotographer,  even I'll be surprised!!  

Saturday, June 5, 2010

Friday, June 4, 2010

Phriday Phun

THE GUESSING GAME - WHAT IS IT?


This really is a PHUN PHRIDAY for me.  I 'retired' from being a real estate agent a year or so ago, but still have a few clients and sales to wrap up.  One of those sales closed Tuesday.   I received my commission check Thursday, and immediately began ticking off all the photography equipment I could buy!  But after a few wonderful fantasy minutes,  I came back to reality and decided to be more sensible: 10% to my church; 70% to savings; AND, 20% ON PHOTOGRAPHY EQUIPMENT!  WOOHOO!!  In between the day's errands, appointments, work, and birthday party for my grandson, I found time to buy the macro lens I've wanted.  (Canon 100mm f/2.8L Macro IS)  After everything quieted down last night, I had to try it out even though it was late and I was tired.  I took these snaps at about 11:30 pm, inside, no flash and no tripod, so they are noisey and blurry, plus the fact that I have no idea how to use a macro lens!!!  Now about the above photos.  I did this once before on a Phun Phriday, and lots of people guessed them all, so I'm wondering if I'll trick anyone this time.  They are all common household items.  WHAT ARE THEY????
(P.S.  Still a few more exotic flowers to come!)   

Thursday, June 3, 2010

Exotic Flower #6


Is it a CONE or a FLOWER??
I sure don't know, but it was unusual and beautiful.  The top part looks like a cone, but the bright red color, and the strange egg shaped white centers looked more like a flower.  I love the details, especially the petals (?) edged in white.

Wednesday, June 2, 2010

Exotic Flower #5

Oh, So Beautiful!
(Remember to let me know if you know the name of this flower)

Tuesday, June 1, 2010

June Desktop Image


Here is my June Desktop Image for you to use, share and enjoy.  Several years ago, at this time, my husband took me to Belize to celebrate my birthday.  (Nice present!)  We went with my brother-in-law and sister-in-law.  It was a beautiful, beautiful, primitive place.  We stayed in a little beach shack right on the Caribbean, and yes, the water was this green and the sky, this blue.  We had the beach all to ourselves as far as we could see.  Just click HERE to download, then right click to set at your desktop image.  It should not be pixilated or blurry.  If you have trouble, let me know.

Exotic Flower #4

These were very large & tall, and were used as a table centerpiece.  (See previous 3 posts)

Monday, May 31, 2010

Exotic Flower #3

We saw these in many places, and were popping straight up from the ground.  (See previous two posts)