High Dynamic Range
(combining multiple exposures)
(combining multiple exposures)
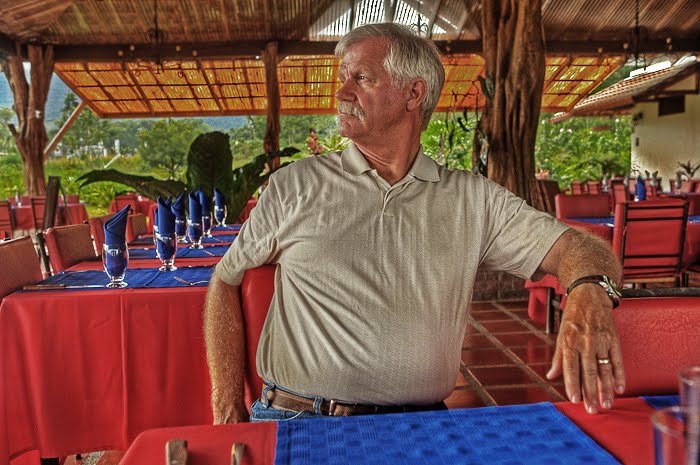
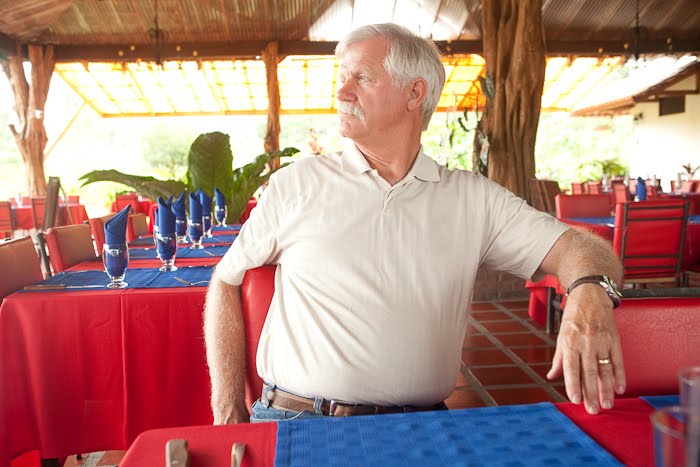
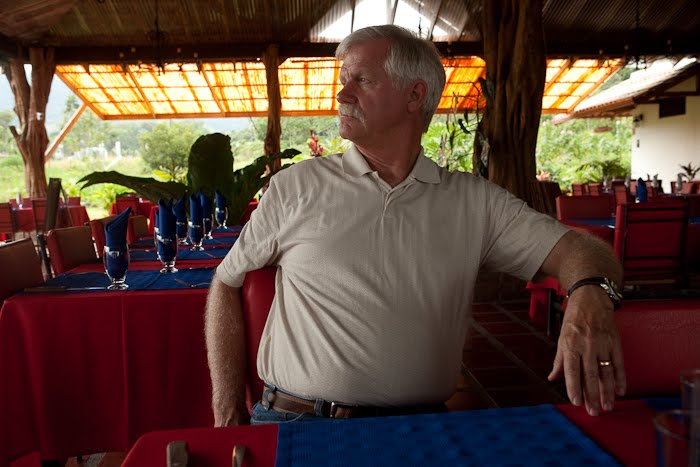
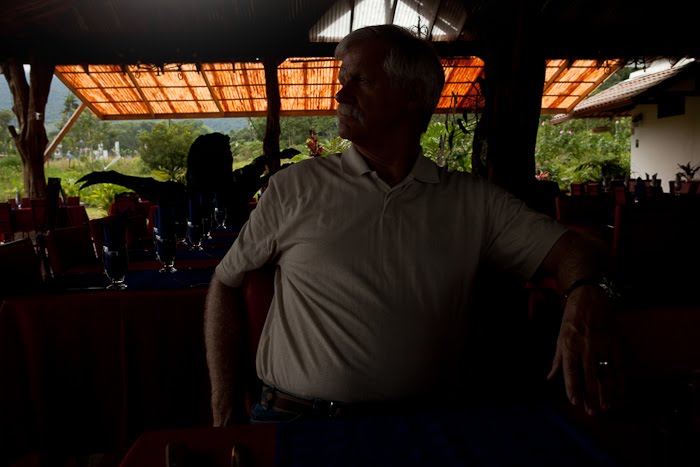
Here is a nice photo of Jeff I took at one of the colorful, brightly decorated open air eating places we saw throughout our travels in Costa Rica. It was raining, which made the colors even more bright and saturated, so I wanted to duplicate what my eyes saw, but what my camera could not record. (Remember that a camera cannot record as many shades from dark to light as the human eye can see.) I should have had a tripod, but I didn't, so I braced my camera to be as still as possible, then told Jeff to hold perfectly still. I set 'auto bracketing' to take 3 shots right in a row. One at +2 exposure, one at the exposure the camera would chose as correct, and one at -2 exposure. I also turned the automatic timer on so I didn't have to push the button, further reducing camera shake. I ended up with the following 3 images. See photos below and more explanation of how I made the above photo.
 In this above shot you can see the colorful tablecloths and napkins, and bright details, but obviously it is all washed out, and the bright background is totally blown out.
 In this shot the camera is trying to do its best to compromise by balancing the dark foreground, tables and part of the ceiling and the bright background, while putting the most emphasis for a correct exposure on the main subject, Jeff. But he is still too dark. All these compromises don't really show how this scene looked to me.
 In this underexposed shot, everything is compromised in order to properly expose the bright part of the roof and the background greenery.
So now look at these 3 shots, then compare them to the top photo, and you can see a fairly good combination of the best parts of all the exposures. If the scene you are photographing is all in even light, there is no need to combine exposures. Or if the scene has a bright upper half, like the sky, and a dark bottom half, like flowers in the shade, one could put a split level neutral density filter on their lens to correct the problem. But in a scene like this, you can use the miracle of computer editing, plus a little know how, (and a decent camera), and make it possible to approximate what the human eye can see. You can do this several ways in Photoshop, or there are numerous programs that combine images and allow you great leeway in adjusting the final image. One can make the image look realistic, or use some 'artistic license' to make an image that is out of this world fantasy looking. I should also add, that I'm giving the basics in the simplest way. In reality there are many more steps involved before I'm happy with the end result.
HDR imaging is still a controversy among photographers. Some 'traditionalists' don't like HDR, or other advances in photographic technology for that matter. I happen to love the look, usually in moderation to make a good image better, but not taken to the fantasy level. If you want to see the King of HDR and some amazing images, (whether you like them or not), go HERE, then let me know what you think! (I just noticed he has a few family photos posted, so scroll down a bit to see some of his travel photos.)

3 comments:
That is very interesting to see the difference in those photos. I really like your tech talk
That is really neat. I had no idea about all that stuff. I like seeing the differences in the pictures.
Great explanation, Karen. I'm going to have to follow you. You and I see HDR in the same way. I too, don't like the fantasy look.
Post a Comment